Thursday, September 29, 2011
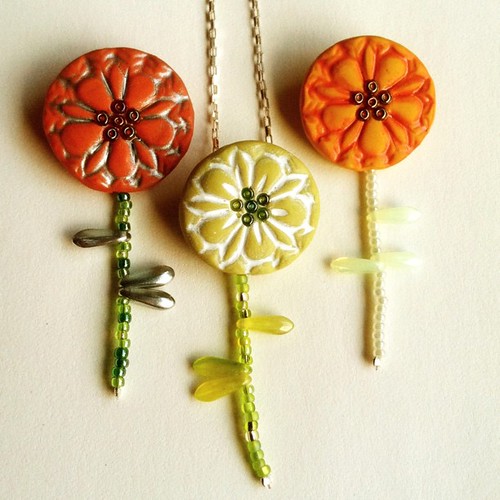
Sneak Peek - Autumn Blooms in Polymer
A day playing around and I had a bouquet of early Autumn blooms in hand! :^)
Tuesday, September 27, 2011
Sweet Little Color Break -POW!
Welcome autumn!
Thursday, September 1, 2011
PESTO!
Another seasonal favorite is basil, Ocimum basilicum. So easy to grow from seeds that I just scatter a seed packet and rake it in. A few months later an overly bountiful and wonderfully fragrant basil crop demands harvest and preserving. An extremely tasty and simple way to preserve basil is to make a pulverized mix of basil leaves and olive oil that is known as pesto.
Incorporating a few other tasty ingredients, my pesto recipe is excellent as a pasta topping, toasted bread spread, or condiment. My method of storage is freezing. Due to the oil in the mix it thaws quickly and it easily brings a taste of summer to the winter table.
Ingredients:
1/4 cup pine nuts
3 cloves garlic, peel and lightly crush -I find it easiest to do this simultaneously by crushing lightly with the broad side of a knife blade. The skins will fall off.
2 cups packed basil leaves
1 tsp kosher salt
black pepper to your taste
1/2 cup extra-virgin olive oil
1/2 cup grated hard cheese of your choice -Parmesan, Parmigiano-Reggiano, Grana Padano etc...
Wash, dry, and pack 2 cups of fresh basil leaves.
Toast the pine nuts lightly in a 450˚ oven, or in a skillet on the stove and stir if needed. Pine nuts brown/burn quickly so watch carefully!
Place first five ingredients in a food processor and pulse until coarsely combined.
With processor running, drizzle in olive oil. Add cheese and blend until just incorporated.
I spoon pesto into freezer bags and freeze for up to one year, although it never lasts that long. ;^)
Enjoy!
Thursday, August 11, 2011
Thursday, July 28, 2011
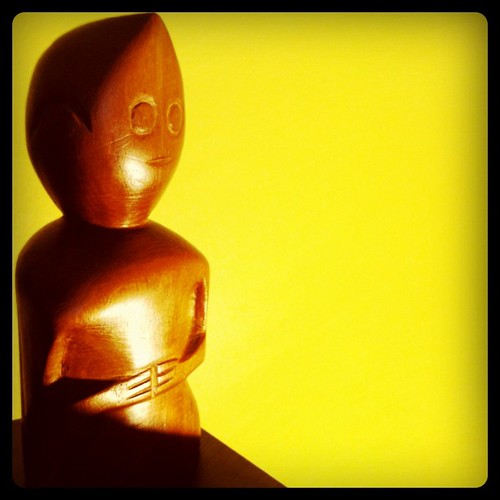
Olo, Newest Wooden Man
The newest addition to my wood figure 'obsession' is also photographed with my new photography addiction. (I recently upgraded to an iphone and quickly discovered the joy of apps, specifically instagrams!)
Here's Olo, named by my daughter. Photographed as an instagram.
Monday, July 25, 2011
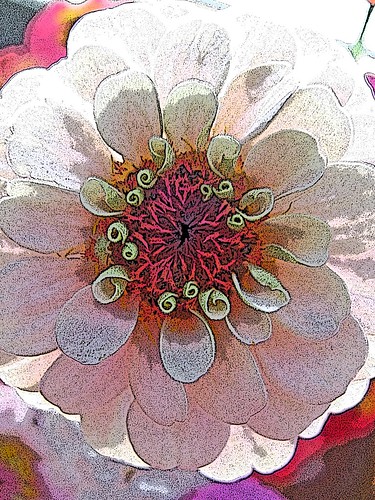
Sweet Little Color Break - Zinnia
A sweet zinnia from my garden. Played around in Photoshop a little. I just love zinnias and finally planted them again after not getting around to it for a few years.
I sowed a mix of several packets in an informal cutting garden. Some of my favorite varieties are "Persian Carpet" and "Cut and Come Again".
Love!
Black Spanish Radish
Since I hadn't requested the seeds and my gardening plate was pretty full they were put into my 'maybe later' bag, which I store in my refrigerator crisper. Every year I would start seed shopping in late January and buy/acquire my new seeds, make my lists of what I wanted to grow, write up my germination plans and start sowing in March or April. Many packets of seeds kept getting bumped to the 'maybe later' bag and as luck would have it this year ended up being the 'use up the maybe later bag' year.
Last night we made a Black Spanish Radish Slaw/Salad using some other vegetables from our garden, our neighbor's garden, and what else we had on hand. Amounts are somewhat fly-by-the-seat-of-your-pantsish as we usually wing it on our recipes. We also believe in seasoning to taste so we highly recommend adding herbs or seasoning to make this to YOUR taste.
Black Spanish Radish Slaw/Salad
2 medium black Spanish radishes -peeled and shredded
1 large cucumber -peeled, de-seeded and cubed
1/2 c carrot rounds -thinly sliced (I used a mandoline)
1/2 c red bell pepper -julienned
2 scallion/green onions -thinly sliced
1 c sour cream -a little more or less is fine
1 Tbsp apple cider vinegar
1-2 Tbsp Dijon mustard
salt and pepper to taste
other spices/herbs as to taste
Combine all and chill. Served here as lunch with a few fresh green pea pods and a sprinkling of black salt. Also good layered open-face on dense brown German bread with hard-boiled egg slices and some Havarti cheese.
Friday, July 8, 2011
New Tool Alert - Foredom Flex Shaft
Between the age of the Dremel, the problems it's having and personally being tired of the weight of the tool I've decided to upgrade.
Here's the newest addition to the studio...... my new Foredom Flex Shaft SR-2272. It has a variable speed foot control and a runs so smoothly! The flex shaft is very comfortable and seems much more flexible than the Dremel. I'm so excited I cleaned and organized the workspace - almost like I'm trying to impress. :^)
Wednesday, June 29, 2011
New Wooden Bust
Friday, June 24, 2011
Red Raspberry Reprieve
Around ten years ago I was very involved in trading garden plants at plant swaps. I acquired some red raspberry starts and plopped them in the corner of my vegetable garden. For a year or two they grew a little and gave a few berries. They were well behaved and I had high hopes.
Over the coming years the raspberries launched a full assault. They sent up shoots everywhere and wherever a branch touched the ground it rooted and sent up a new plant. The other downfall was the berries. There never seemed to be a great amount and when they did appear they coincided with the appearance of the Japanese beetles who quickly covered the berries.
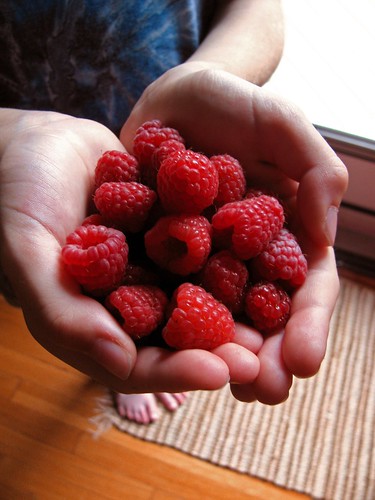
Early this spring I told my husband I was planning on ripping them all out of the garden since they took up too much room and underwhelmed with their fruit. Well they must have been listening - this year I have a bumper crop and the kids have been picking and eating until full! I pulled some out that were going far beyond boundaries and have made an allowance.... they can stay, but will be held to their corner. At least for a few more years. :^)
Tuesday, June 14, 2011
Sweet Little Color Break - Bracelet Detail
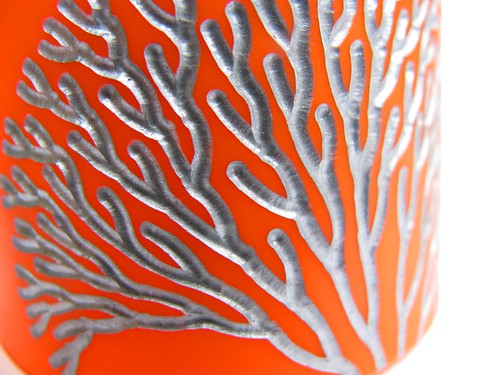
A new cuff bracelet I made last week. It isn't really this red, actually a rather bold, bright orange. The lighting gave it a red cast. I liked the pattern and texture on this piece and while photographing it for listing on Etsy I just kept coming in closer... and closer.
Makes me happy!
Friday, June 10, 2011
"Turtle in the Road!"
I flashed back to a very sad, hot summer day a long time ago, when I jumped out of my car in a vain attempt to save a turtle stuck in the road. I was standing on the side of the road waiting for one last car to pass before I could run out to grab the turtle..... well - that last car.... I cried for quite a long time.
This turtle was not going to be left in the road! I stopped and scooped up the turtle who immediately pulled in his (gender verified by herp loving friend) head and hissed. I set him down on the passenger-side floor mat and he immediately started crawling around. The children were so excited and wanted to know what we were going to do with him. At first I said I would take him home and let him go in our garden, but then I remembered the lawn-cutting crew who managed to run over a rabbit last year and I thought not.
A local park, Monocacy Park, has a nature area - perfect! After the children got on the bus I took him home for some photos.
The children had a half-day for the last day so after they came home we all went to the park where we let him go. He happily ambled off into the woody underbrush as we said our goodbyes and wished him well.
Wednesday, June 8, 2011
Shattered
Having done some faceting in the past, I began to explore the idea of a shattered faceted piece. This ring is the first prototype and while there are things I like about it, it doesn't quite capture the effect I wanted. The lines are a little thicker than I would like and the division of space a little too regular.
Monday, May 30, 2011
Sweet Little Color Break
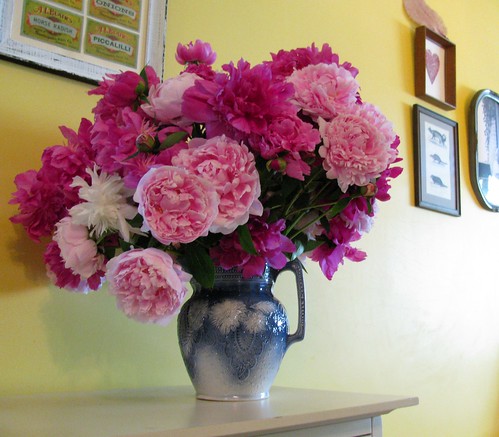
Every year I look forward to the peonies blooming in the garden. Some are plants that I started from sections of my parent's plants. They are old, originating with the first owner of their Victorian - probably 60 years old at least. Some are newer plants that I purchased.
Their scent is heavenly. The fuchsia flowers smell largely like peonies. The medium pink is the variety 'Sarah Bernhardt' and is my favorite. The older varieties don't have as showy of a flower - but the scent!... one smells very strongly of rose and the other - clove/cinnamon!
This overflowing and gloriously blowsy bouquet is the result of the inevitable rainstorms that flop my peonies every year. They give me a week of justifiably extravagant bouquets.
Thursday, May 19, 2011
Weighting it Down
There are a lot of options out there for weighting the legs of your tent. Some people purchase tent weight bags or make their own with sand. Others haul empty water cooler bottles that they fill with water. Since I wasn't sure that water would be available I rejected that method. Other people use weight disks from barbell sets, actual barbells and cinder blocks. I wanted something that would go with the look of the tent and was something I could make myself. A quick Google search brought up a fantastic tent weight tutorial on the Etsy Metal Blog.
I won't try to copy the tutorial here, please visit the links if you'd like to try to make your own. I just thought I'd show a few of my steps and my optional/additional handle method.
Here is my PVC in capping process, with the 8 inch eye bolt through the drilled cap. This end will be on the bottom when the concrete is poured. Nuts and a washer are threaded on the eye bolt for extra strength when embedded in concrete.
Here I have shoveled the Quikrete concrete mix into the tubes and I am waiting for it to set more before I cap the open end.
Here is a finished weight with my optional handle. The Etsy Metal Blog tutorial mentions an option where the handles are screwed on. I really liked the look, but the hardware store didn't have sturdy enough handles (everything is stamped/formed sheet anymore...where is the solid metal?!?). I opted instead to use two large hose clamps and a length of knotted rope.
The tent up, and weighted! The weights are approximately 35 pounds/ 16.5 kilos each.
Considering I bought the tent on a Thursday, started shopping for all the weight supplies at 9:00 am Friday, and had the tent up by 10:00 am Saturday I was pretty pleased with the results. Thank you Etsy Metal Blog!
Tuesday, May 17, 2011
Awesome Venue for an Art Show
Growing up here, almost everyone had ties to 'The Steel' - Bethlehem Steel, that is. Fathers, brothers, uncles, neighbors... someone you knew worked there. You couldn't help but be aware physically as well. Driving through many parts of the town offered impressive views of large office buildings, rail lines, and most spectacularly - the blast furnaces and stacks. I remember many childhood drives past the plant, being awed by the massive size and gritty, raw industrial power. Night drives were always a time to be on the lookout for 'the fire on the stacks'. Tall towering burn-off stacks with leaping, glowing flames at the top were mysterious and dangerously exciting to my young eyes.
But Bethlehem Steel's steel making days have ended and for many years the structures and buildings have sat empty and decaying. Still industrially beautiful, but in the way of age and rust.
I had heard a little about new developments underway at the plant. A new casino went in and I heard talk of an arts venue, as well as a skate/bike park. Other distractions kept me busy and I was unaware of the spectacular changes taking place - revitalization and new life taking root in an exciting new venture/venue called ArtsQuest™ Center at SteelStacks™.
I was approached by a staff member at ArtsQuest™ about applying for their new SteelStacks™ Arts and Antiques Market . The market runs all summer long, May 14th - Aug 28th. I applied and was accepted for four weekends - May 14th-15th, 21st-22nd and June 4th-5th, 11th-12th. When I arrived to set up I was immediately impressed by the power of the venue. My tent has the orange tablecloth.
While the first weekend was rainy and sales were slow, the enthusiasm of almost everyone involved was so infectious. There is a definite feeling that this event is just going to continue to grow! The ArtsQuest™ Center at SteelStacks™ venue is open and has events ongoing 365 days of the year. The view of ArtsQuest™ Center from my tent.
As I was leaving after the first day, my tent closed up tight for the night, the colorfully lit stacks as a backdrop brought back an oddly familiar sense of mystery and wonder.
Wednesday, April 20, 2011
Focus: Letters
Some time ago I submitted releases and gave links to the photos I thought might be considered. Well a few days ago UPS pulled up and I couldn't for the life of me remember what I had ordered! I usually am anxious to receive supplies or new collection items so I was quite puzzled.
Oooooo! When I saw the return address label for Stirling Publishing I had an idea what it was. I found that two of my photographs were included. My kids are excited that Mom is in print. I think it's pretty neat too.
Mine is the Orange Block Black M.
The Ferry Morse Seed Box S is also mine - the small green paper label on wood in the middle.
Sunday, April 10, 2011
Newest Collected Figure
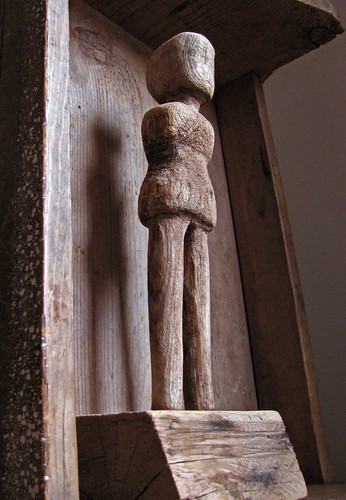
I really like this figure. No face or arms but lots of character. I was told it could be cottonwood and was found in a barn in Arizona. Some gnaw marks suggest rodent action. Here 'he'? is posed in the underside of a small bench set on end.
I really like the shadow... very Goreyesque.
Friday, April 8, 2011
Sigh No More
I was not familiar with Mumford and Sons...Thank you Dave, for lending the CD. This was just what I needed right now. Thank you Glenn. I love you!
I have to add this isn't an official video, but a film camp project - and I think it's just wonderful!
Sneak Peek - Ring Necklaces
I've decided to offer some in a more versatile format. Strung on a simple knotted cord they are a fun casual necklace. Easily removed they can be worn as a ring. Of course now I'm wanting to make some pieces similar to these that are meant to be worn entirely as necklaces - square holes, smaller holes etc...
Some day I need to actually list all these new pieces I make. If only the photographing and editing was as fun as the making!
Self Portait 4/8/11
I was never really comfortable taking self portaits. I have decided to get away from the posed and stilted ones I usually end up with. Wildly spinning around the room, dancing, singing, shaking my head - letting it all out -having fun.
Really happy with how this one came out. Maybe it's all the new hair, but I love the mood.
Wednesday, March 30, 2011
Carved 'Racy' Lady
I wonder, was she a high-school woodshop 'naughty' creation? Was she meant to be a doll? She seems a little racy for that. She seems to have 1950's aesthetic with the hairstyle.
She is now mine. Newest addition to the carved wood people collection.
Friday, March 25, 2011
Salt
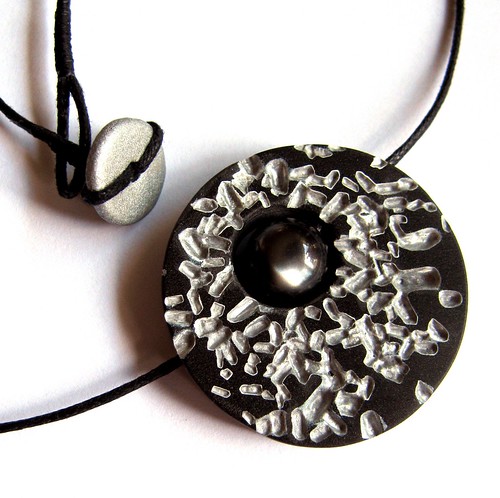
This is a piece I started a year ago. Part of my Moonglow series, it sat in a box for a year. I've recently taken another look at this series and am doing a little re-working of finished and unfinished pieces.
This piece is made by embedding epsom salt in the clay, curing, and then removing the crystals - soaking is an easy method. Silvery acrylic paint details the impressions.
A charcoal moonglow bead is in the center and a silvery ceramic disk bead forms a simple toggle clasp.
Get the Message - Catharsis
To the troubles in my life, and the person who causes them - a necessary cathartic collection to speed you on your way.
Wednesday, March 23, 2011
Asobi Seksu - Thursday
Seems like I'm listening to a lot of music and working slowly. I hope to have some work posted soon, but until then a little something fun to listen to.
Monday, March 21, 2011
Kate and Anna McGarrigle: Petite Annonce
It must be the changeable spring weather... but I find myself in a McGarrigle kind of mood. Always a good listen. Enjoy.
Wednesday, March 16, 2011
Sweet Little Color Break - Kanye on Quilt
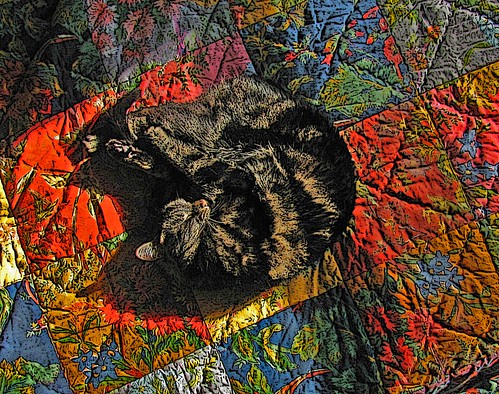
There is not much that is more cozy than a cat sleeping on a pretty quilt in the sun.
The sun actually washed out the colors in the bright parts of the photo and obliterated them in the shadows. Playing around in Photoshop to try and repair led to experimenting which led to a fun saturated-yet-washed-out poster effect.
Brightened up a gray day.
Friday, March 11, 2011
Polymer Faces with Acrylic Paint
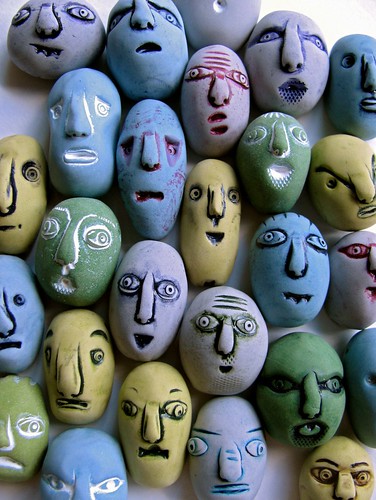
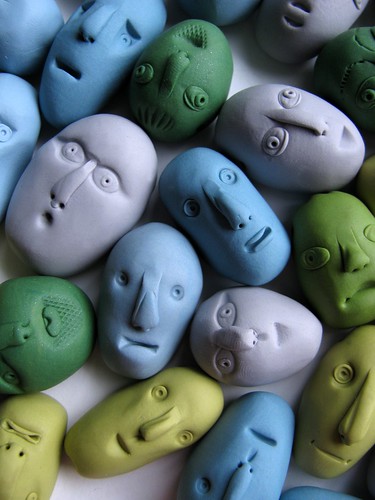
Daily Art Inspiration- 3/3/2011 Polymer Faces with Acrylic Paint, originally uploaded by Lynn_EL/UnaOdd.
The faces have been painted and sanded. Next I need to figure out how I want to use them. I like the idea of just a single head on a cord - that seems to be how I do most of my work. I am admittedly not a talent when it comes to combining elements in a multi-beaded manner. This is something I need to challenge myself with - do some growth and exploration.
Meanwhile so many of the faces are reminding me of people and characters although none are based on any existing person. I may have to name them!
Hope you have a great weekend!
Prime Numbers -Family Geekery
It just tickled me today that I realized that my family members' ages are all prime numbers right now - 7,11,41,43. The fact that I'm the largest number, (oldest) of the bunch, only slightly dampens the enjoyment. My daughter also has an affinity for primes and chose her basketball jersey, 43, specifically for that reason - she is one cool 11 year-old...
Today just seemed a good day to celebrate our prime-ness - 3/11/11.
Do you have a fun prime number story?
Wednesday, March 9, 2011
New Wooden Head Fits My Mood


I have a thing for carved wooden heads. There is a certain type that I am attracted to and I scour Ebay and Etsy for great finds, but unfortunately on Ebay I am usually outbid on the type I like best. Sometimes I torture myself by looking through completed items and just yesterday was heartbroken to see my ideal carved man's head that went for a Best Offer of $10! $10!!!!
Woe. Note to myself that I need to check Ebay more often.
I did however then browse Etsy and picked up this hatchet-faced fellow. He is happily settling in amongst the rest of my collection. Yay!!!
Now to the mood - a bit of a depression and a bit brooding.
Boo. Hoo.
Tuesday, March 8, 2011
Sneak Peek - Facing It
Some new pieces, hand molded. These are flat-backed and top drilled side to side to be used as pendants, but I think I will also be doing some without holes next. I'm thinking of the un-drilled ones being combined in a grouping as a wall piece or selling as supplies.
They're very fun and freeing to make and I like the occasional fingerprint - they are handmade after all and I like leaving a bit of a personal mark on each piece. They are smallish, averaging 1 inch high and about 1/2 inch thick - excluding noses ;^)
Monday, February 28, 2011
Photo Styling Tip - Vellum
I have found that a very simple sheet of translucent vellum paper is a great styling aid. Vellum is commonly available in most art supply stores. Look in the fine art or scrap-booking sections. It can be a little expensive but if used carefully one sheet should last for many photos.

Here is a mousepad that I had made using a photo of some of my unfinished pendants.

The vellum softens the colors and my rue pendant is brought to the forefront.

I love to collect and buy artwork from other artists. As well as decorating my home they can be useful and beautiful styling props. I would suggest contacting the artist if you are planning on using their work. Asking permission is always appreciated and many artists will be very happy to have you use their work especially if you credit and link. Here is a beautiful mosaic piece from Margaret Almon of NutmegDesigns and the resulting styling.


I really love the bold patterns and naturally lovely colors of Tracy Melton's work at Focuslineart.


Even three dimensional objects can be turned into intriguing backdrops when you use vellum. Margaret Oomen's fabulous stones, found at RESURRECTION FERN take on a delicate mystery.


There are so many other possibilities that I want to try out - ferns/leaves, wood type, colored cords, marbles, starfish/shells. I think it also is a good way to create a unified feel using diverse materials.
Try it out and have fun!

